
Backpacks

Whew! I managed to make, not just one, but, TWO backpacks today!
I searched the web for ideas and utilized this pattern and idea and made a tutorial for you.
I found there was no tutorial out there that had good step-by-step instructions.(Now, I didn't look very long, either, because I wanted to jump right in and try it!!)
You will need:
~1 pc. of cardstock (8 1/2 X 11 is good)
~Velcro
~Scissors
~Ruler
~Something to score your paper with
~Patterned paper (if you want to add it to the flaps)
~Glue and/or Sticky Tape
~Ribbon (either 1 pc. of 16 inches long OR 1 pc. of 12 inches and another 1 pc. of 4 inches (if you want the straps to be a different color from the hanging strap)
~Distressing ink (optional)
~Other embellishments as you desire, such as brads or buttons
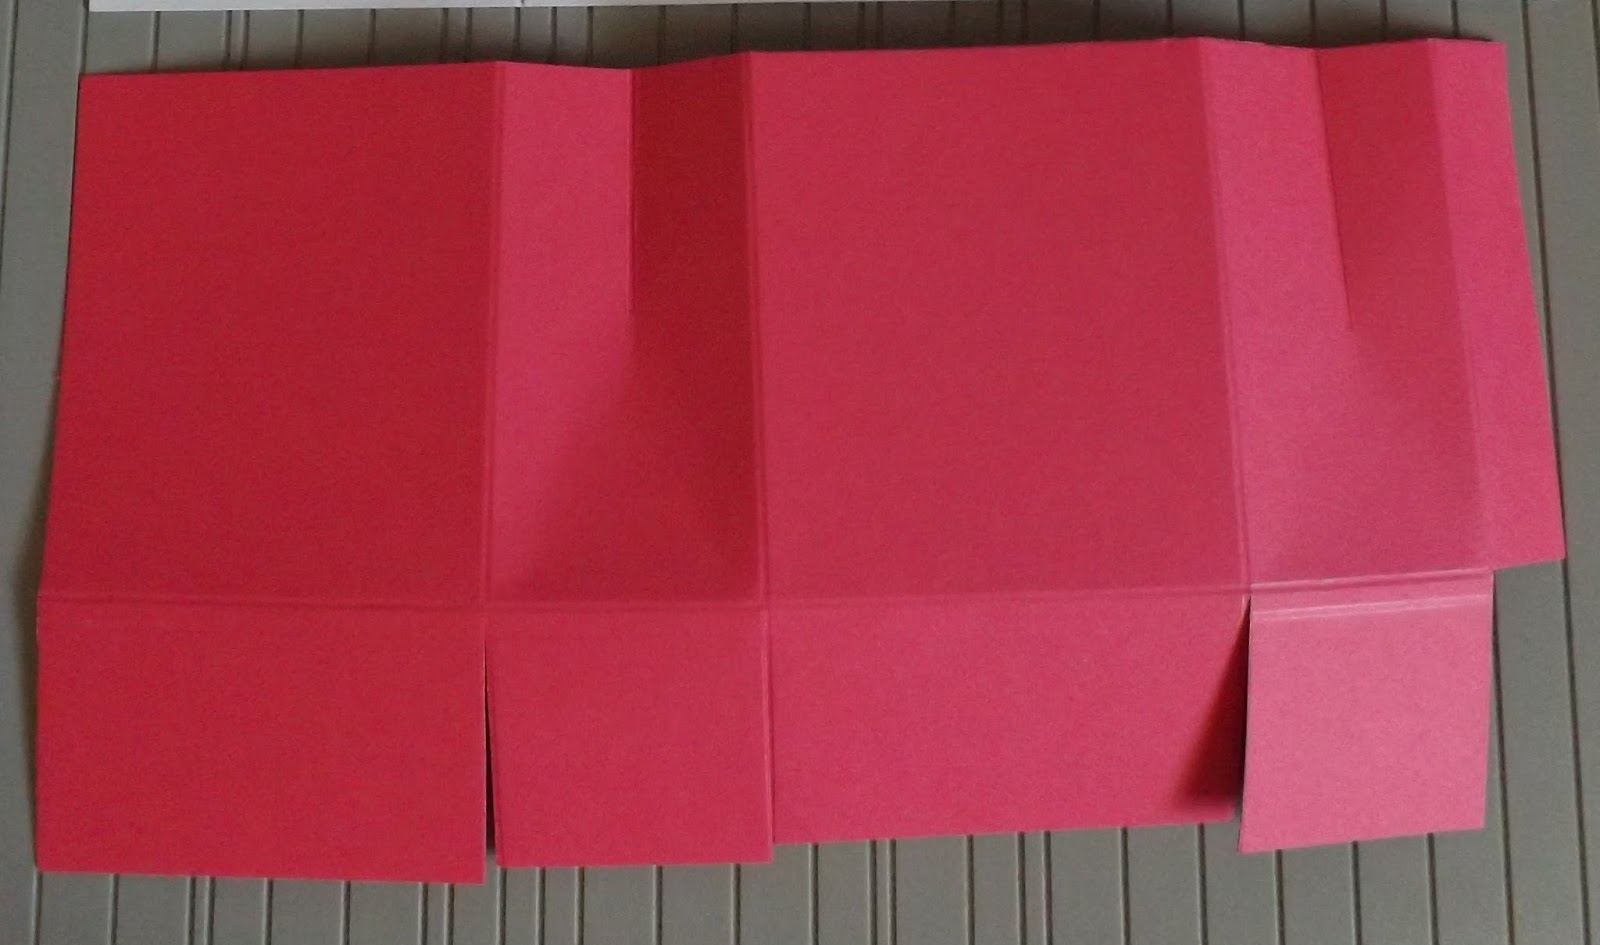
Here are the pattern pieces:
The cardstock is cut 10 1/4 in. X 5 1/4 in.
Score as it shows in the picture:
At 3 in. , 4 3/4 in. , 7 3/4 in. and 9 1/2 in.
Then score lengthways at 3 1/2 in.
Also score a couple of small lines so the backpack will close more easily.

Cut where it shows. Punch holes for the ribbon to go through.
Here are the smaller pieces.
Backpack flap.
It is 2 15/16 in. ( a little smaller than 3 in. so that it fits snugly onto the back of the backpack.) X 2 1/4 in.
Score a fold line at 1/2 in. Round the edges. Punch holes for ribbon.

Front pocket flap.
It's 1 1/2 in X 2 in.
Score at 1/2 in. and 1/4 in.
Round edges.
The part that says "Glue to backpack". That's done later.

Front pocket
3 in X 2 in.
Score three edges at 1/2 in and 1/4 in.
Cut out the bottom corners as shown.

Here are my pieces cut and folded.
*I forgot to take a pic of the pocket after it was cut,oops!


At this point you can distress the edges of your pieces. This is totally optional! But I can't help myself, I HAVE to distress!!!


The next step after you have all your pieces cut and ready to put together is to make sure the holes line up for the backpack pattern and the backpack flap. Position the flap to the INSIDE of the backpack pattern and punch holes, if you haven't done it up to this point.
Then glue the flap to the backpack pattern.

Be sure and glue the flap to the INSIDE of the backpack pattern.
You don't want to see where the flap was glued to the OUTSIDE of the backpack.

Now you will want to cut your ribbon into two 6 in. pieces and a piece that is 4 in. The 6 in. pieces will be for the shoulder straps and the 4 in. piece is the hanger piece of the backpack.

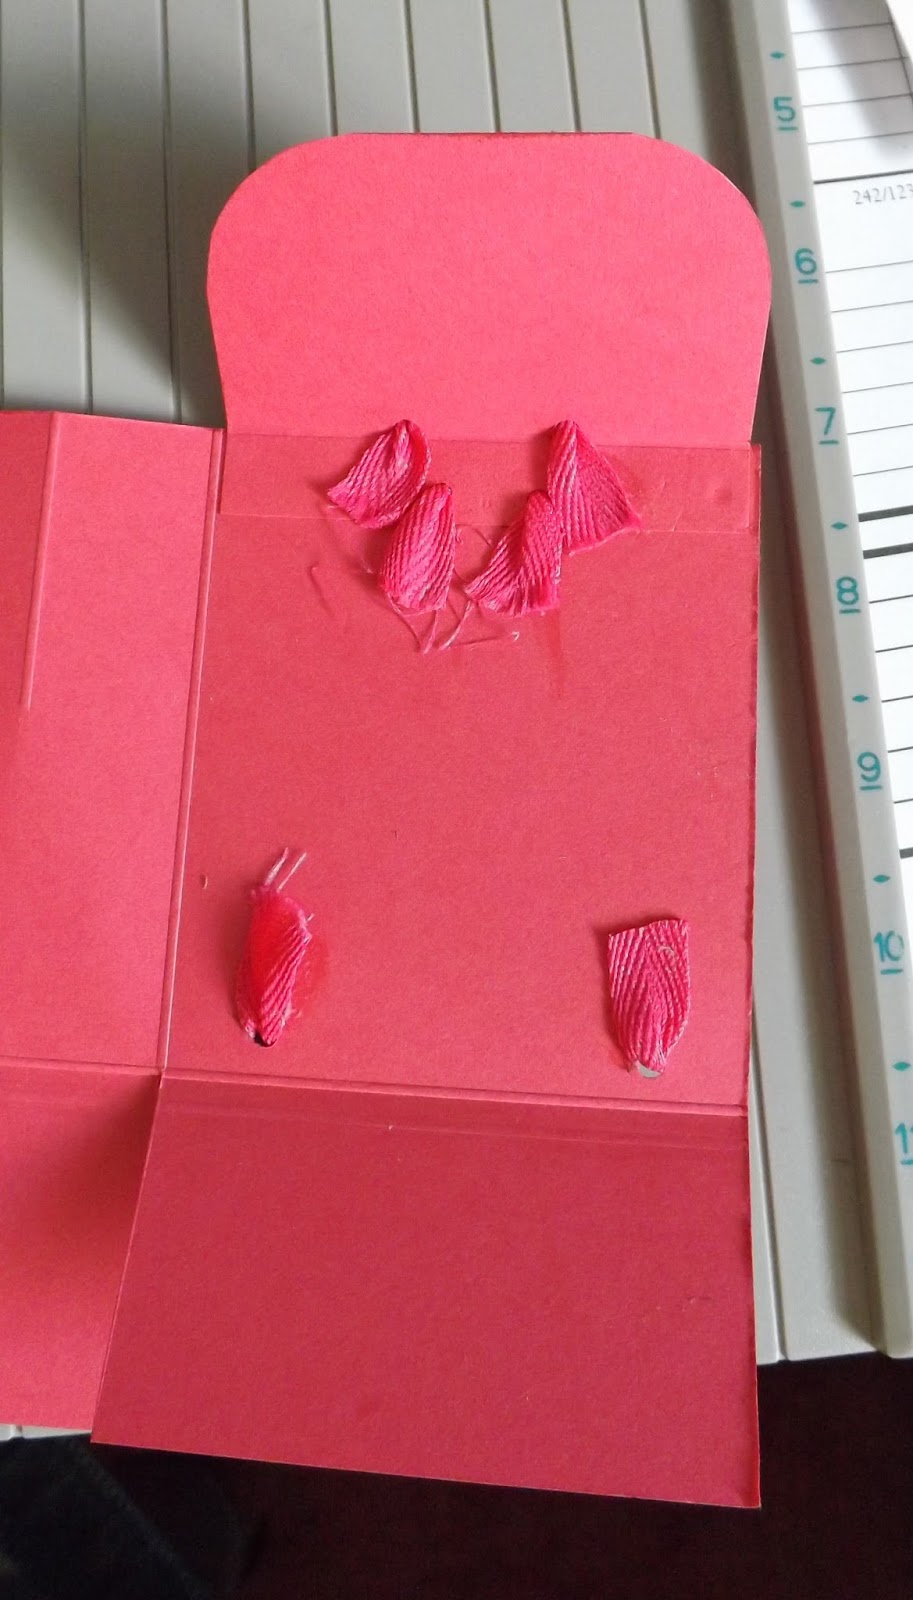
Poke the 6 in. pieces through the holes at the back of the pattern and turn over and glue the pieces down as shown.


Then using the 4 in. piece, push it through the top holes.

Glue the pieces down. It will look like this on the inside.
While that is drying, you can get the front pocket ready.
See where the 2 pencil dots are? This is where you will need to put glue.
This is the INSIDE of the front pocket.

Fold up the bottom piece and glue it.
This is what it will look like when glued.

Now you will need 2 more drops of glue at the top to glue on the pocket flap.

This is what it will look like when glued.

That is ready to go on the front of your backpack. But first you must glue the backpack together!

Fold it all together and glue it in place, making sure that the flap is on the inside. You don't want to see where the flap is glued to the back of the backpack.
Fold the flaps in at the bottom and glue in place. This is what you now have as your backpack is starting to come together and actually start looking like a backpack!

Fold the flap down in the front and add the velcro to the flap and backpack so you can open and close it. At this time you can add a brad or some embellishment (such as a button)
Then add glue to the back of the front pocket and glue it to the front of your backpack. Add velcro to this little pocket as well so it can be opened and closed. Again, add a brad or button, if you like.

This is what it's like when it is done! So DARN CUTE, isn't it!!!!!


I loved it sooooo much that I just had to make another one!

Wouldn't it be neat if the pieces were stitched?? I have so many ideas racing through my head that I could do with this pattern!!! Gonna have some fun. Will have to make some more this weekend!!
Challenges:
~Created With Love-back to school
~Make My Monday-3D
~Party Time Tuesdays-back to school
~Crafty Creations-make 2 of something
~Paper Pretties-school
~Paper Shelter-ribbon
~Penny's Paper-Crafty-ribbon
~My Heart Pieces-metal (brads)
~3 Girl Jam-back to school ( and ribbon)
~Sister Act-anything goes
If you have any questions about this tutorial,please email me (email in sidebar).
(¨`•.•´¨) Hugs~Make My Monday-3D
~Party Time Tuesdays-back to school
~Crafty Creations-make 2 of something
~Paper Pretties-school
~Paper Shelter-ribbon
~Penny's Paper-Crafty-ribbon
~My Heart Pieces-metal (brads)
~3 Girl Jam-back to school ( and ribbon)
~Sister Act-anything goes
If you have any questions about this tutorial,please email me (email in sidebar).
`•.¸(¨`•.•´¨) from the
(¨`•.•´¨)¸.•´ Heart
`•.¸.•´ ~DEANNE~
. . . psst, don't forget to check out my {PIN}spirational Challenge Blog !


16 comments:
Absolutely adorable! Thanks for sharing with us at Crafty Creations!
Tracey F., DT Crafty Creations Challenges
Oh my, these are so so cute. Thanks for joining us at PTT.
OMG this is adorable and your tut is great. Thanks for sharing the tut with us. Thanks for joining in the fun at Created with Love Challenges. Linda K. DT
WOW! What a fab tutorial and back packs! Thanks for joining us this week at Created With Love Challenges for our Back To School Challenge!
DawnD
Deanne, these backpacks are amazing! I want one! lol truly, you did wonderful xxxooo
Those are totally adorable! Anyone would love to receive them. Thanks for joining us in our "make two" challenge at Crafty Creations. I hope you get to join us again in the near future.
Lovely card, great use of ribbon.
Great tutorial
Thanks for joining us at The Paper Shelter this week.
Hugs Debs
Such a cute project. Love love it. Thanks for entering our Back to School challenge at Created With Love Challenges.
~~Chris
Superb....so very wonderful....n thanks for the tutorial..
These are great - beautifully put together.
Thanks for joining us at Penny's.
Helen x
These are the cutest backpacks! Thanks for joining us over at 3 Girl Jam Challenges! DT Member Carri~Abusybee
Wow, I love your tutorial! Thanks a lot!! Backpack are so lovely! Thank you for joining us at Paper Shelter Challenge this week. Hugs, Merkkari
This is great Deanna. Thank you for sharing your tutorial. I am always looking for new ideas to show my crafters here in Cyprus. Please may I share it with them.
Wynn xx
This is wonderful! Thanks for the tutorial, glad you joined us at 3 Girl Jam challenge - Back to School. Julie O DT member
http://muddypawsinkyfingers.blogspot.com
Awesome project and fantastic tutorial! Thanks for linking up with 3 Girl JAM!
Julie
These are super adorable! Thanks for the awesome tutorial too!!!
Thanks for sharing and linking up over at 3GJ for our Back to School w/Ribbon Challenge!
Hope to see you play along again for our next challenge :)
Jessica
3GJ~DT
Post a Comment